
II. Essayons ("Let us try")
Having selected the Battle of First Bull Run as the topic for Baptism at Bull Run, I moved on to the next phase of the project: map creation. In addition to a few new concepts that I wanted to incorporate into the map's design, there were a number of ideas that evolved or were added as the work progressed.
My first task was to find one or more suitable maps upon which I could base my design. Before I even began, I knew that I wanted to base the game's map upon an authentic period map. With that in mind I began scouring numerous sources for maps of the Bull Run (or Manassas) region of Northern Virginia.
With luck I found a number of maps, including:
Unfortunately, none of these maps provided me with the level of detail that I wanted for the game. It was not until I stumbled across a map that was prepared well after the end of the American Civil War that I struck gold (figuratively speaking, of course).
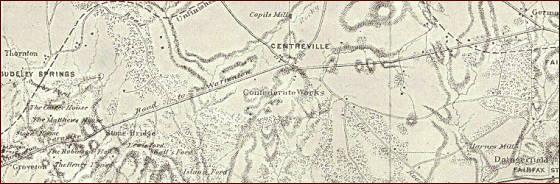
This period map was prepared by the Office of the Chief of Engineers U.S. Army in 1877:
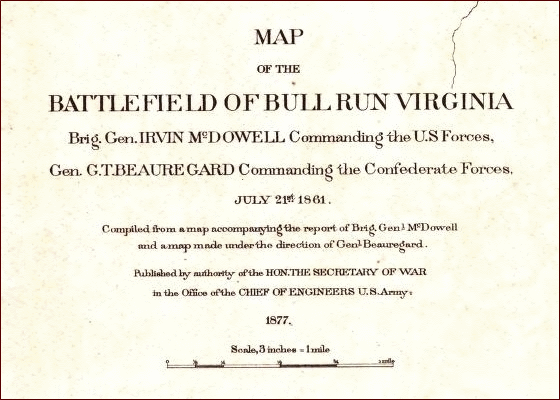
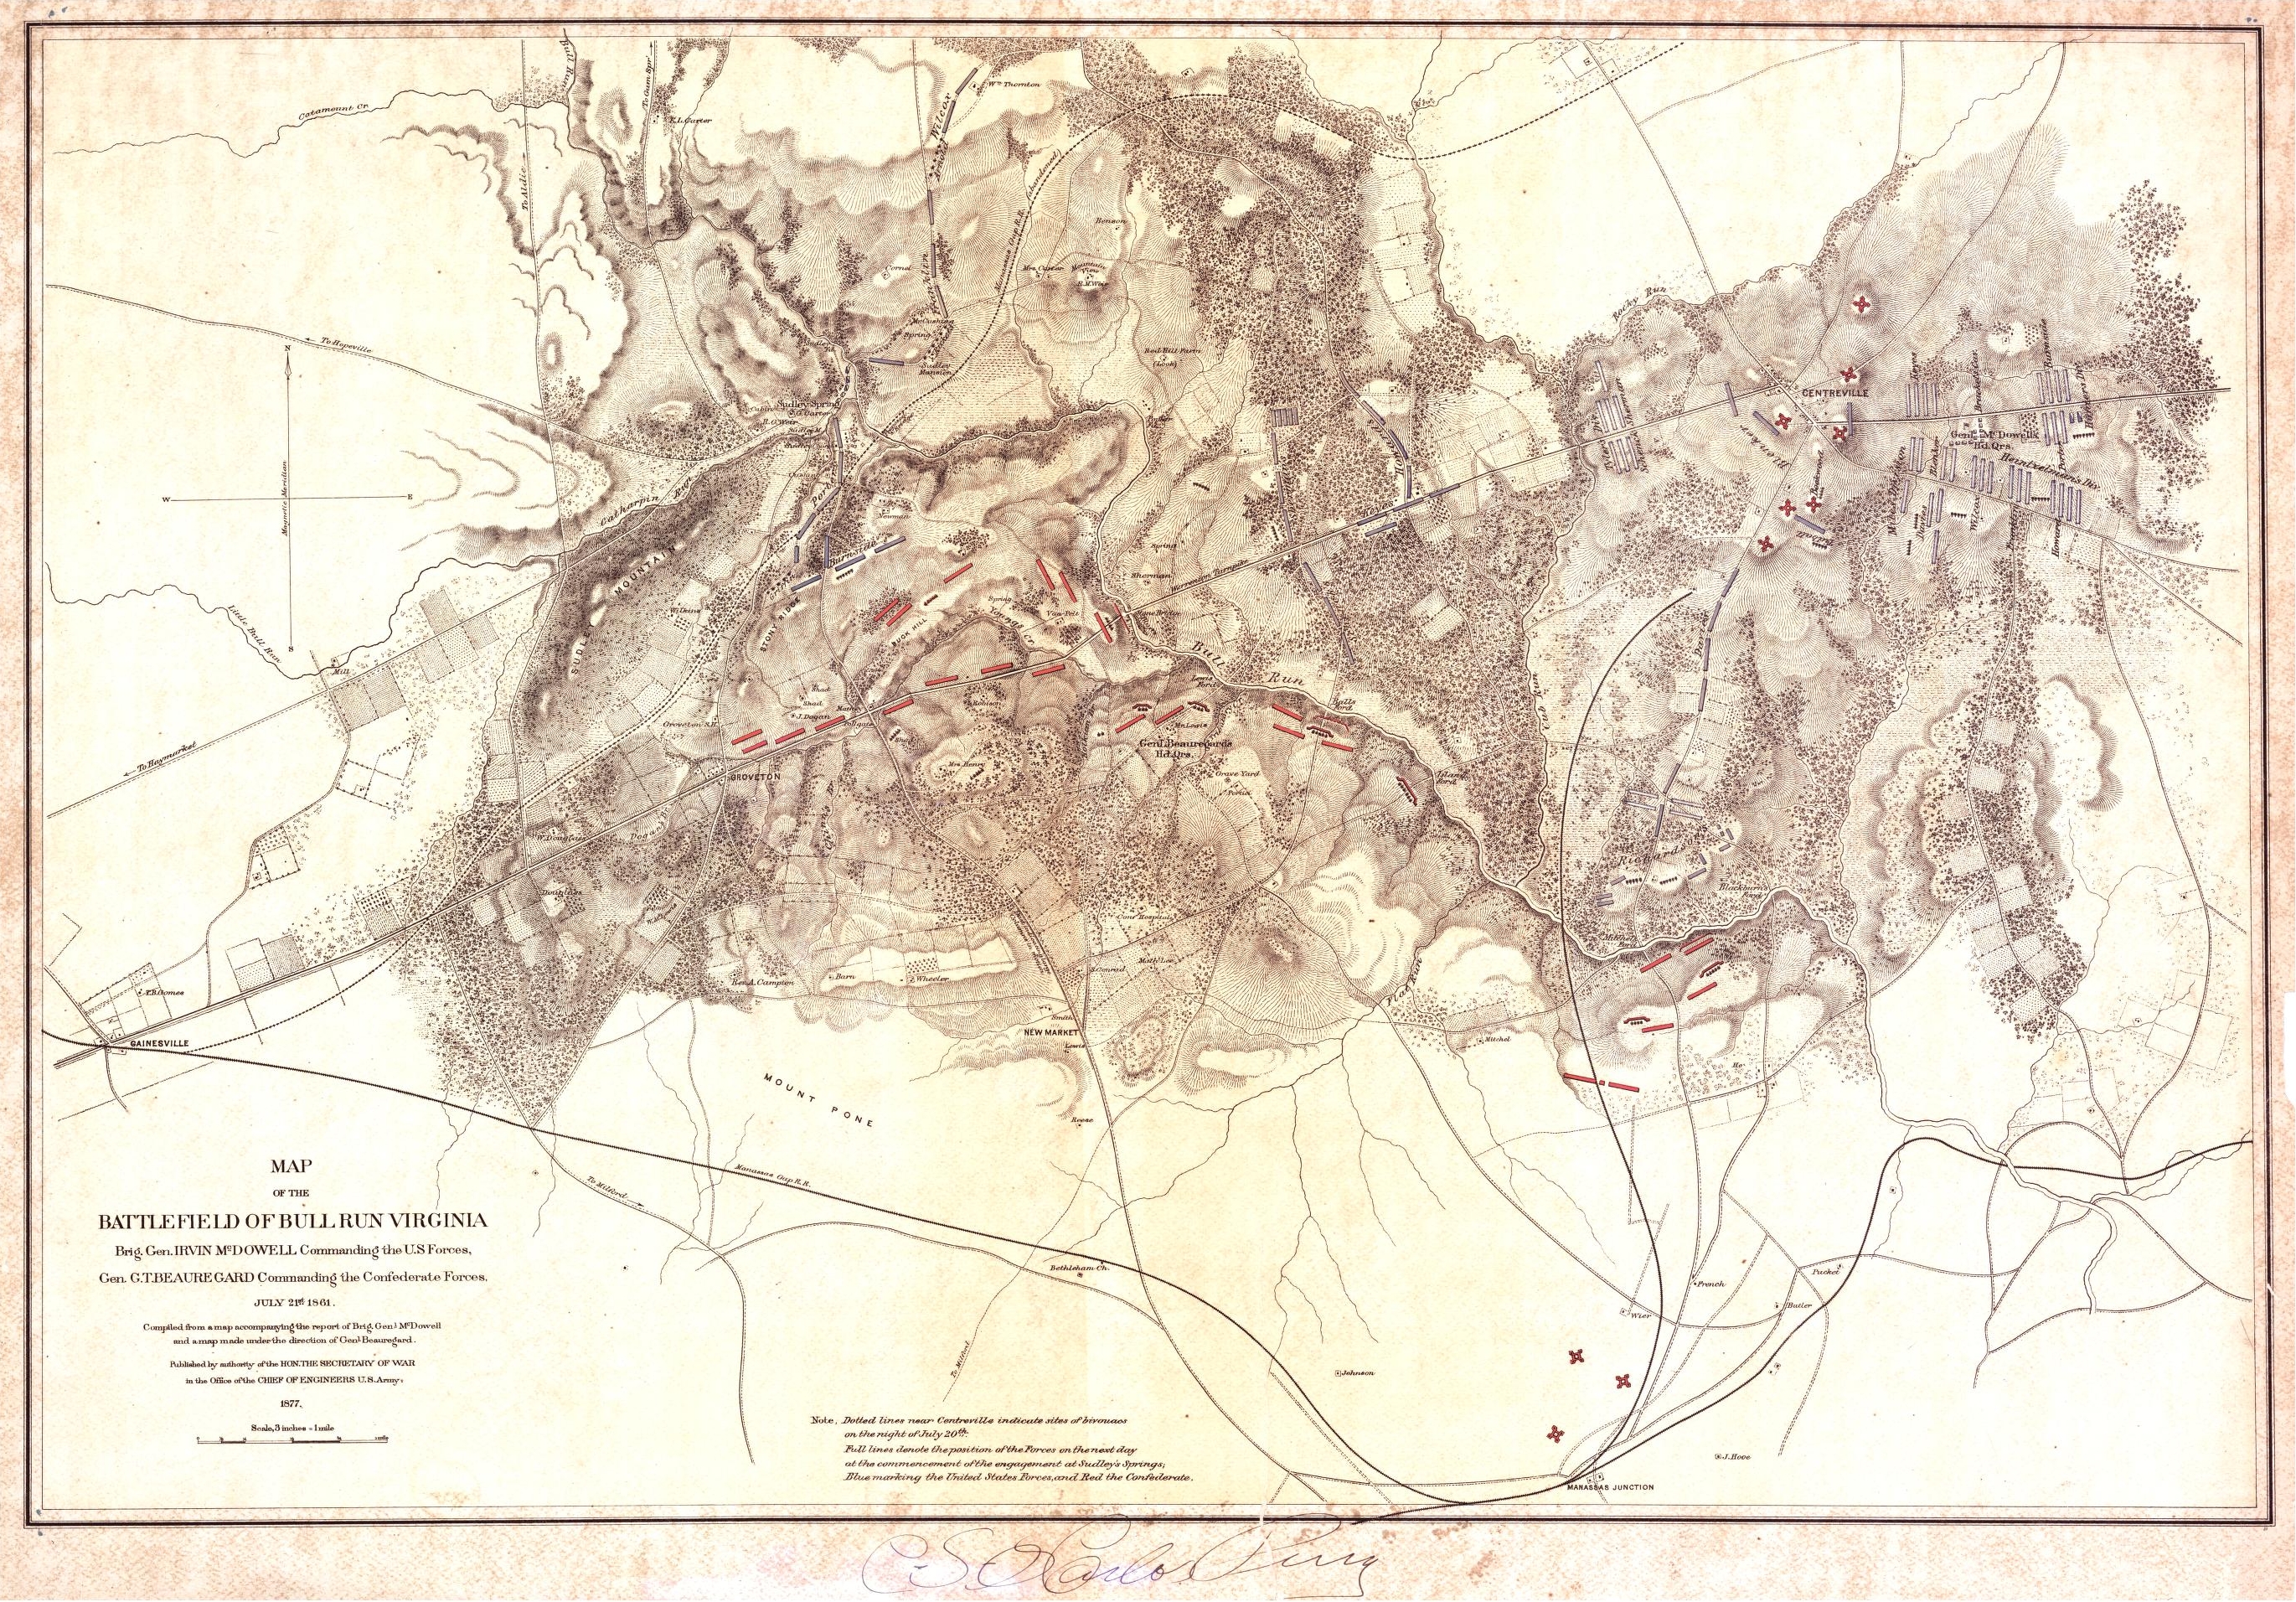
Map of the Battlefield of Bull Run, Virginia (1877)
The 1877 map provided me with almost exactly the level of detail that I wanted for the game's map. It depicted among other things vegetation density, approximate elevation, and hydrographic features as well as man-made surface features including roads and buildings. [As an aside, I should note that the map depicts a rail line crossing Bull Run between Island Ford and Mitchell's Ford, which did not exist at the time of the battle. This railroad spur was built after the Battle of First Bull Run by the Confederates defending Centreville and Manassas and was destroyed by them in early 1862 when they withdrew from the area. Also, omitted were the field fortifications depicted on the map but dating from this same, later period.]
With map in hand, my next task was to determine which portion of 1877 map I wanted to depict for the game—if in fact, I chose not to use the entire map. However, after a careful deliberation I settled upon a portion of the 1877 map bordered by: an important road junction in the north (used by the Union's 2nd and 3rd Divisions during their flank march on the day of the battle), Centreville in the east, Blackburn's Ford in the southeast, New Market in the south, Groveton in the west, and an unnamed ford in the northwest. I chose to exclude the more southeasterly features of Bull Run (McLean's Ford, et al.), since I wanted to be able to utilize the Confederate units stationed there as reinforcement units in the game. (I will cover the game's units in more detail in the next design diary entry.)
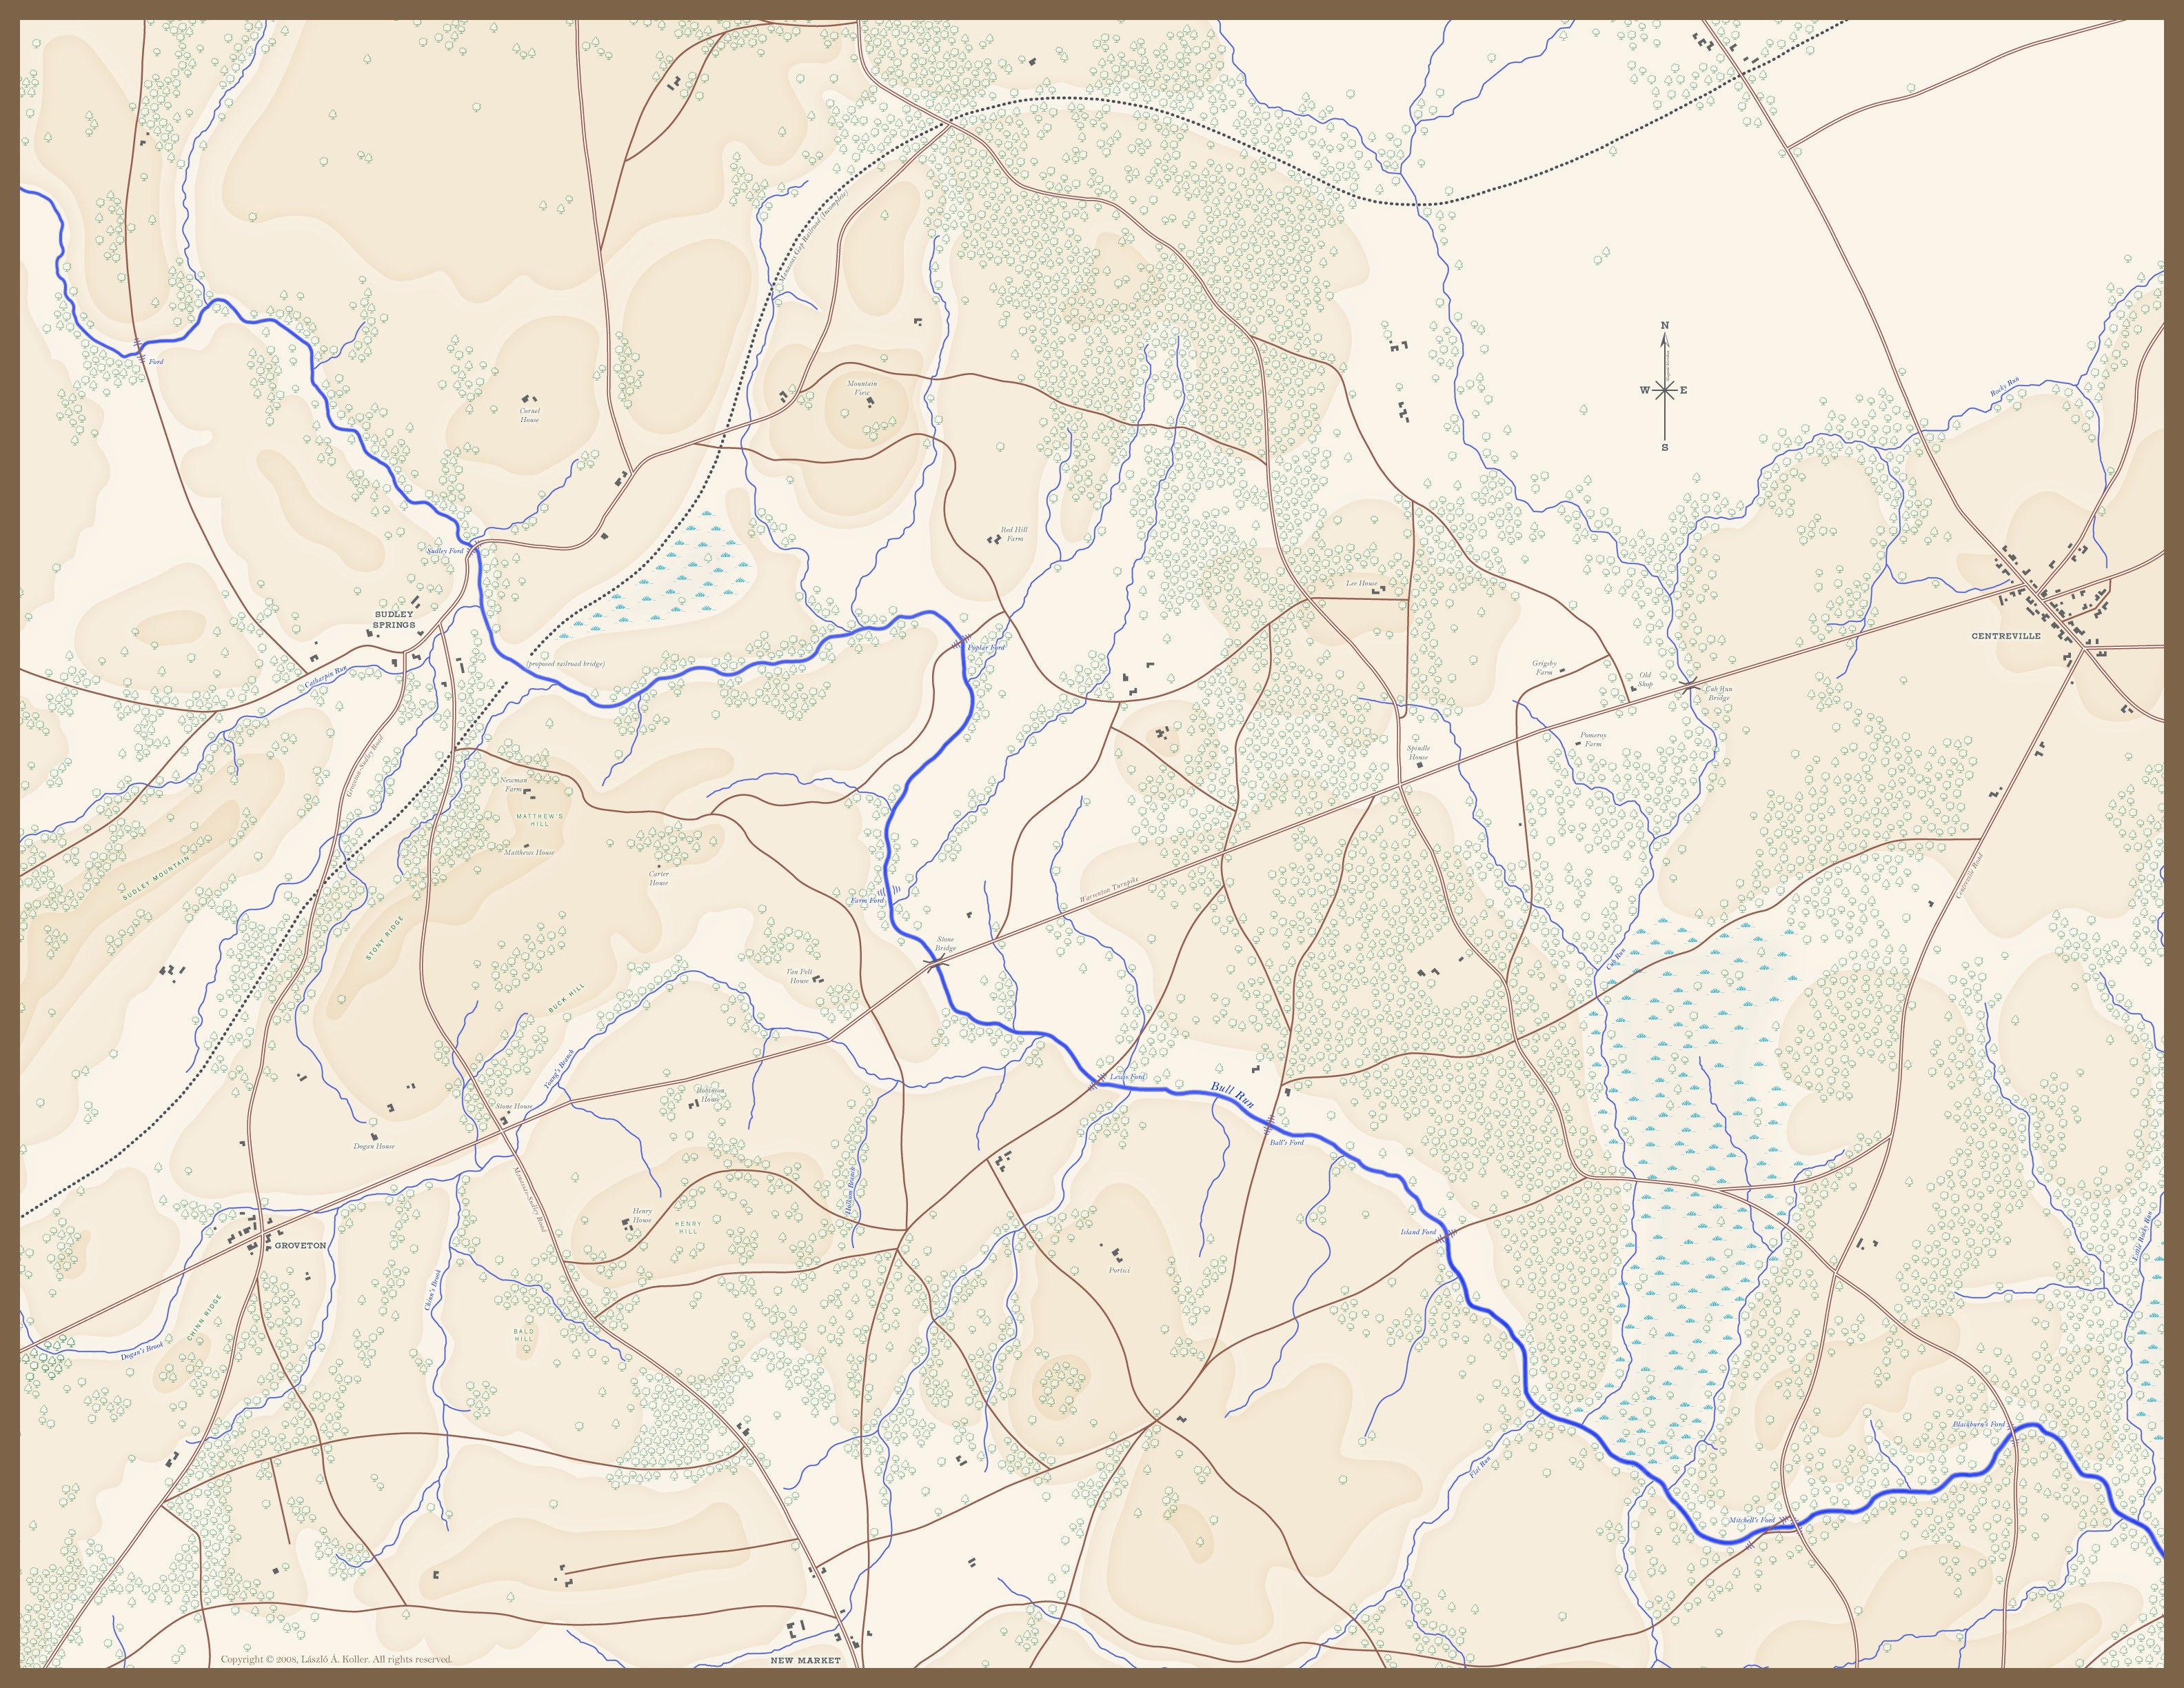
The creation of the map followed next. First, I laid out three levels of elevation not based upon contour elevations, but instead upon my interpretation of the hachuring appearing on the 1877 U.S. Army Engineers' map. Next, I added the primary hydrographic feature of the map: Bull Run, as well as numerous smaller brooks and streams (some unnamed). After the streams and brooks were drawn, man-made features like roads (main and local), the unfinished railroad (rail bed), and buildings were added. Finally, I added trees, trees, and then some more trees; a very few positioned with artistic license, if only to breakup the monotony of this seemingly endless task. (To be honest, I think that after placing so many individual trees by hand, I may have hallucinated because I could have sworn that I saw some Entwives wandering about.)
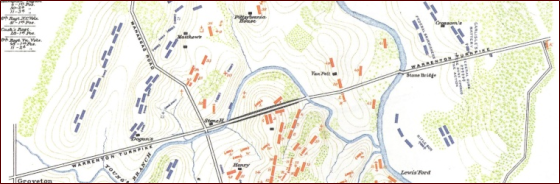
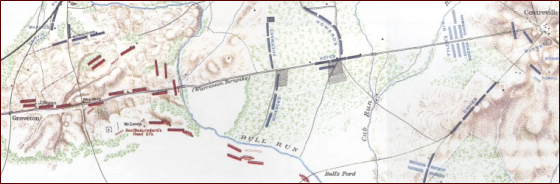
A comparison of the original 1877 map (on the left, below) and the terrain map rendered for the game (on the right, below; scaled to match) highlight their similarities:
 |
 |
| 1877 Map | Game Map (terrain only) |
After the terrain map was completed, it was time to add the various game-related map features. These included boundaries (which divide the map into areas called locales; more on these in a moment), approach penalties, locale capacities, locale identifiers, and a number of other symbols including setup locale symbols [flags], reinforcement entry symbols [colored triangles], and objective symbols [colored stars]. Regarding the locale identifiers (that is, the unique numbers in each locale), I felt that it was important to include them so that players could easily identify and communicate specific information about their respective units and their positions; this is especially important when playing remotely via the Internet.
While I was designing the map, I wanted to visually and conceptually differentiate the locales' borders as they relate to movement and combat. My first task was to separate these two concepts into boundaries and approaches. Boundaries are the rectangular boxes that separate locales on the game map; they serve only one purpose in the game: to regulate movement. Although the map began with only two boundary types (passable and impassable), three distinct types evolved by the end of the process. Passable boundaries, as their name implies, allow any units to cross unhindered. Similarly, impassable boundaries prevent all units from crossing them, although units may secure an impassable boundary's approach (in order to bombard enemy units in an adjacent locale, for example). The restricted boundary, the third boundary type, limits how units cross them. (Note: They do not limit what types of units cross them.) Some field commands, like cavalry marches and road marches, allow units to move multiple locales; such commands may not be issued to units crossing restricted boundaries, since units must begin their move adjacent to a restricted boundary and end their move after crossing it. (Field commands will be covered in a future design diary entry.) I should note that unlike Stone Bridge, which is the only passable boundary across Bull Run, all of the fords are represented by restricted boundaries.
Examples of the three types of boundaries are (from left-to-right: passable, restricted, and impassable):
 |
 |
 |
| Passable Boundary | Restricted Boundary | Impassable Boundary |
While boundaries regulate movement in Baptism at Bull Run, approaches only regulate combat. Every boundary has two approaches, one on each of its long sides. In turn, each approach may have one or more symbols in it. These symbols, or approach penalties, regulate combat and are divided into four types: infantry, cavalry, artillery, and obstructed. The infantry, cavalry, and artillery penalties reduce the combat effectiveness of units (corresponding to their type) during combat, specifically during assaults and charges. (Again, I will cover field commands in a future design diary entry.) The obstructed penalty prevents cavalry units from participating in combat, either offensively or defensively.
Many of the attributes of the map are depicted in the following sample:
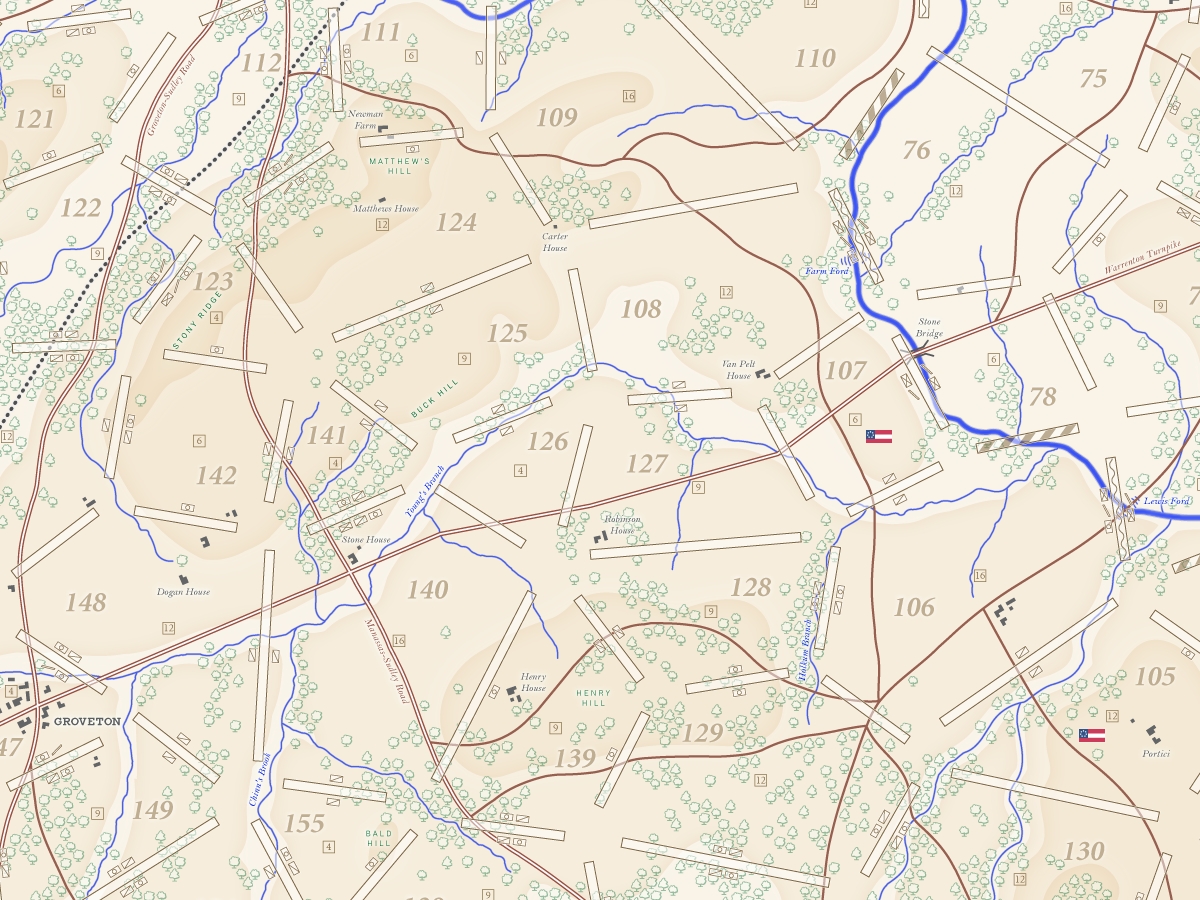
Robinson House and the surrounding area, including Henry Hill and the Stone Bridge
In addition to defining the difference between boundaries and approaches, another of my design goals was for both players to be able to take the offensive and actively attempt to win the game. (Historically, both sides planned to take the offensive, but the Confederates were compelled to cancel their offensive plans.) However, I did not want to simply recreate an exact simulation of the actual battle—although such is a possible outcome. Thus, one of the game's "on map" features is the objective locale, which is individually marked on the map by the objective symbol [star]. When captured, an objective provides an immediate negative effect on the opposing army's morale. The concept for the objective locale grew out of the idea that historically Henry Hill was the "line in the sand" for the Confederates. The Confederate army's leadership felt at the time that if Henry Hill fell, then they would have to withdraw from Bull Run (and therefore most likely lose control of the crucial railroad junction at Manassas). For the game, I wanted to add incentive for both of the players to defend such locales and thus, force combat to occur. The star-marked objective locales were not meant to symbolize important locales themselves, but instead they represent the vulnerability of off-map strategic goals and thus, should be defended at all costs. If a player captures an objective locale, then their opponent's last line of defense may be considered as having failed.
An example of a Union objective locale and Confederate objective locale follow:
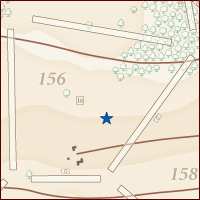 |
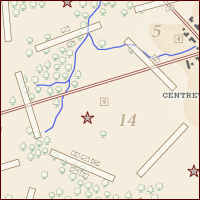 |
| Union Objective Locale | Confederate Objective Locale |
With all of these visual details rendered and after nearly 300 man-hours of labor, I completed the map for Baptism at Bull Run. In the end, the map was designed to cover two 22" x 34" game boards, which if physically produced would be paired together to form one large 44" x 34" map encompassing all 159 locales.
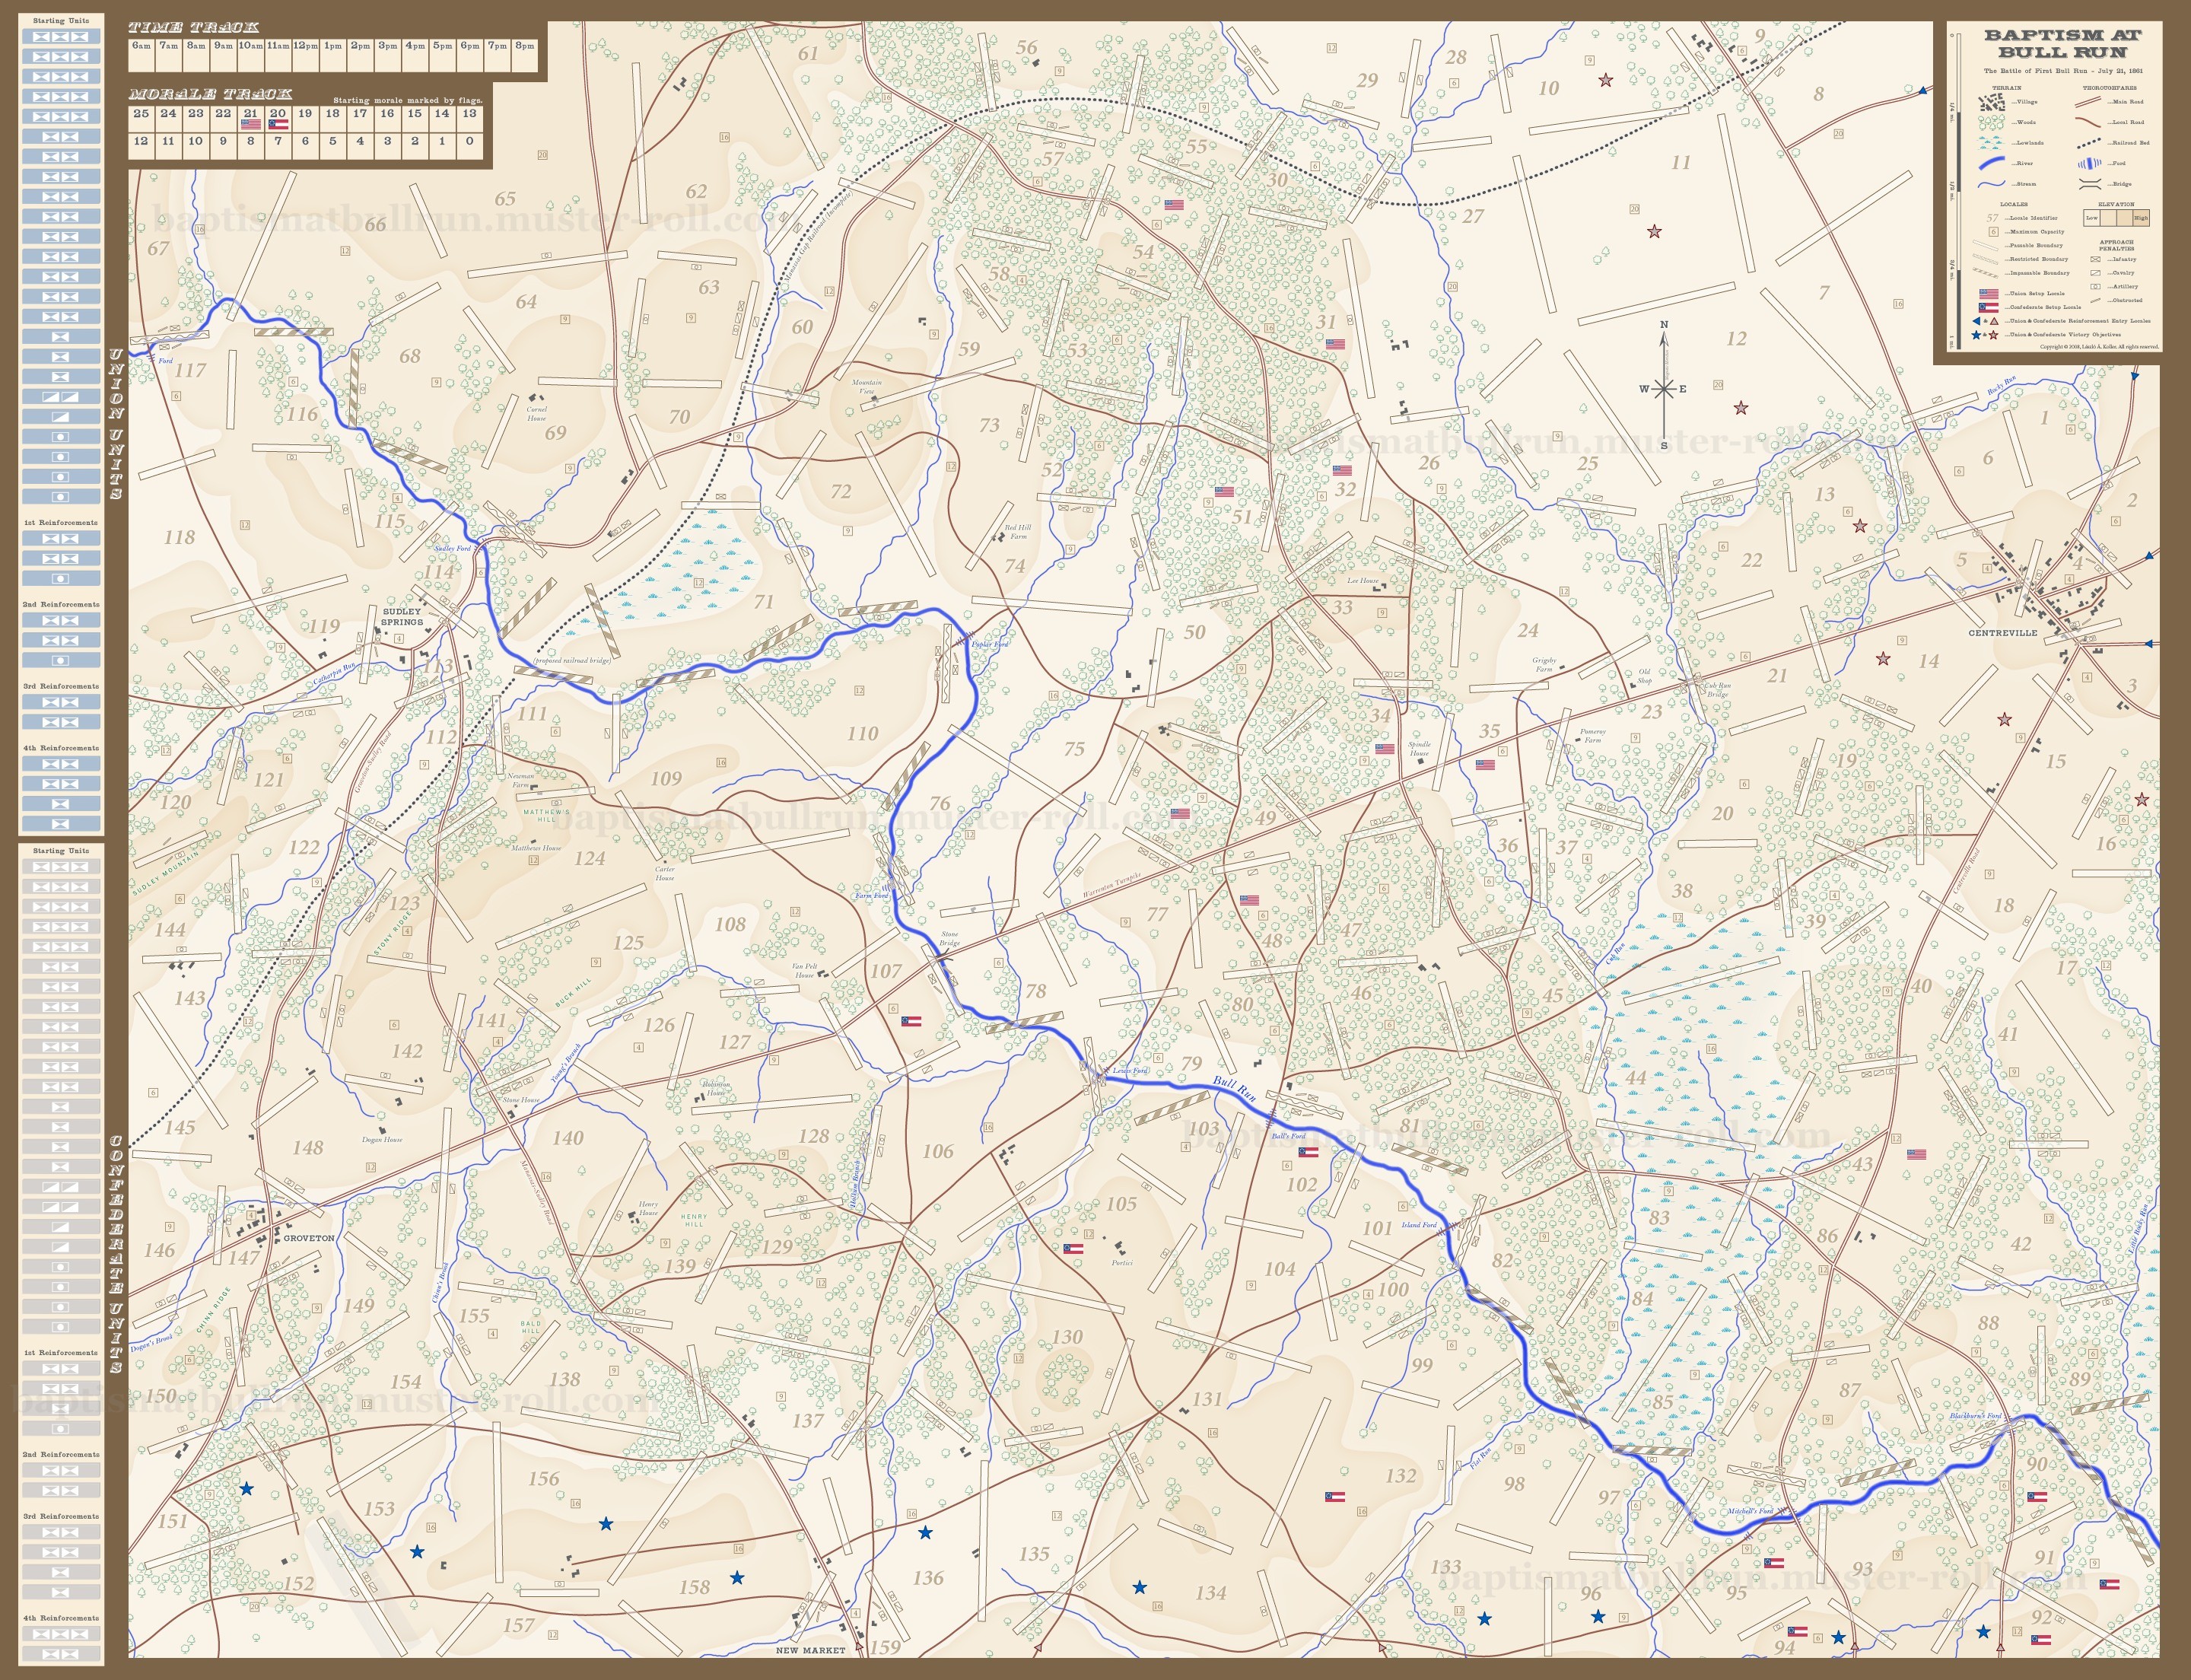
Baptism at Bull Run game map
(click for a larger version)
The next design diary entry will cover units that appear in the game, including the new disrupted infantry unit.
Released: 2008-05-13 14:30 EDT.
For questions and/or feedback, please send e-mail to: baptismatbullrun@....com (Click the hyperlink to reveal the e-mail address.)
Further discussion about Baptism at Bull Run can be found at either of these game hobbyist websites: BoardGameGeek ConsimWorld